最近老王需要修改一篇文章,编辑要求将修改的部分加上“Track Changes”,方便审稿人查看修订的部分,网上查了下,可以通过 Latexdiff 这个工具实现 LaTex 修订,自动标注修改的部分,本文分享下使用方法。
一、Latexdiff 安装方法
本文的安装环境是 Ubuntu 18.04,直接在软件源安装即可:
sudo apt install latexdiff
如果你是 Windows,可以按照下面的步骤安装:
- 安装 Perl:https://www.perl.org/get.html
- 从 CTAN 安装 latexdiff:https://ctan.org/tex-archive/support/latexdiff
- 解压 latexdiff,并复制到 Perl > bin 目录下
- 使用 latexdiff
如果你是 Mac,可以安装下面的步骤安装:
- Mac 自带 Perl,直接去 CTAN 安装 latexdiff 即可:https://ctan.org/tex-archive/support/latexdiff
二、Latexdiff 使用教程
latexdiff 是直接操作 .tex 文件的,例如你有原始的 .tex(draft.tex)和修改后的 .tex(revison.tex),可以生成一个 diff.tex:
latexdiff draft.tex revision.tex > diff.tex
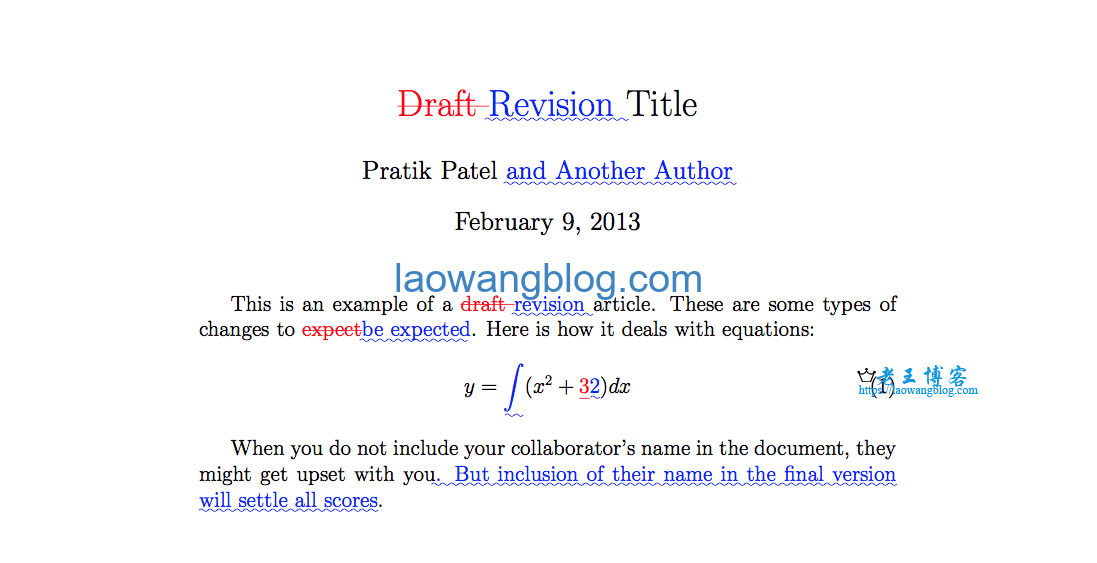
之后直接 copy 一个项目(老王是基于 overleaf 的),用 diff.tex 里的内容替换你的 .tex 文件内容就行了,样式不会变化,就是会在改动的地方加上标注,如下图:
一些 latexdiff 常用的选项:
UNDERLINE—added text is wavy-underlined and blue, discarded text is struck out and red;CTRADITIONAL—added text is blue and set in sans-serif, and a red footnote is created for each discarded piece of text;TRADITIONAL—likeCTRADITIONALbut without the use of colour;CFONT—added text is blue and set in sans-serif, and discarded text is red and very small size;FONTSTRIKE—added text is set in sans-serif, discarded text small and struck out;CHANGEBAR—added text is blue, and discarded text is red. Additionally, the changed text is marked with a bar in the margin.
参考文章:
- https://www.overleaf.com/learn/latex/Articles/Using_Latexdiff_For_Marking_Changes_To_Tex_Documents


